Tuesday, October 30, 2012

TST #35 - Daniel's black and blue

No, No, don't adjust your sets.  This truly is black and blue.  This particular quilt was made for my nephew.  This 2007 pattern was handed out at a Quiltsitters gathering I attended and is called Bordered Nine Patch from Kaye England.  The sample shown at the gathering was done in pinks and browns.  I filed away the pattern like so many other patterns that I had been collecting. 

When my nephew said that he would like one of my quilts, I thought this pattern would be ideal.  He had suggested that since I was making quilts and giving them away to charities, perhaps he should designate himself as a charity (LOL) and I could give one to him. 

Okay, Okay!  I asked what colours he would like.  No I was not about to let him select the pattern.  I had done that once before with another gifted quilt and the pattern chosen was a real challenge.  His response was a resounding BLACK and WHITE and one other colour.  So many B&W quilts were being made with RED, so I chose to go against the grain and used BLUE.

The quilt, finished in 2008, was given to my nephew for his birthday.  At the time I gave it to him, he had been accident prone so I told him that the quilt was the only thing I wanted to see black and blue!  This year at thanksgiving I had visited him and noticed that the quilt was not in use.  He said he had it, but it was now being used by his daughter.  Yes you guessed it.  He suggested that I make a quilt for her so that he could get his quilt back.  I guess that is the next one on my list.


Wednesday, October 24, 2012

Beginning Reveal

Today is reveal day over at Tangled Textiles for the last in our Theme challenges.  Vicki picked this theme and you can read some of the challenges that all of us faced.  Here is my piece, which I have called Fowl Beginnings.
 
One of the challenges that I faced for this piece included curved piecing.  I used this to created the branches in the piece.  As you can see the curves were simple and few!!

 
I added leaves using fused applique...(oops picture is on its side, but you get the idea)

 
 and set myself to adding a nest using wool roving, some feathered fur and some dyed kunin felt that I distressed.  I used fine tulle to hold it in place till I could stitch it down.


It didn't look the way I had envisioned it so I added some decorative wool to the edge to create some additional depth and texture.  The sewing machine foot kept getting caught in the wool, so I covered this with tracing paper and stitched it all down.  This is what it looked like.


I tore away the paper and then added eggs.  I used a pigma pen to create the cracks in the egg and a tiny sliver of yellow felt for the beak.  Do they look like they are ready to hatch?
 
 
Whew!  I managed to try some things that I had not done before and I must admit, even though frustrating at times, it was fun to see the idea I envisioned turn into a reality.
 
Stop by the Tangled Textiles blog and see what the others came up with.
 
Till the next time,  keep stitching.
 

Sunday, October 21, 2012

Thread painting is done!!!

Remember I posted here about doing some thread painting on a quilt for my Guild's show.

I was so worried about taking that initial stitch and then when I actually got started, I just couldn't stop.  Here are some more close ups of the work that I did. 
This was the flower petal and the next picture is of one of the leaves.  I was using Sulky 40 weight rayon thread and ended up using 3 different yellows on just this flower petal.
 
This is another one of part of the flower.  sorry for the blurry picture, but I still haven't figured out the proper macro setting on my camera.
So here is a full shot of one of the flowers on the quilt,
 
and here is the full shot of the quilt.  Oh ... that little purple thing hanging on the right side....Yah, uh huh it's a ribbon alright!  I couldn't believe it.
This quilt taught me a good lesson.  Don't let fear stand in the way of trying a creative technique that you haven't tried before.  To say it another way...Just become something is difficult doesn't mean you stop trying, it just means you try harder.

Tuesday, October 16, 2012

TST #34 - Going in Circles

I've been going in circles the last few days, getting ready for my Guild's quilt show.  So....even though I'm a bit late, today I'm quickly dipping into my trunk to show you a small quilt I donated to a farmer's craft market that my sister was attending.  It was an experiment in curved piecing, that turned out pretty good.  Let's say good enough that I kept the templates I used and will try it again.  Here is a picture.
 
Next up....Hmmm let's see.....

Saturday, October 13, 2012

Thread, Thread and more Thread

Just a quick post while I'm taking a break.  My Guild is having a quilt show October 20 and 21, 2012 and I have been FMQing like a mad woman trying to finish a quilt that is registered for the show.

Here is a peek at the thread painting that I've been doing, but I'm not so sure that it's looking very good.

These are close ups because some members from my Guild may be lurking and I'd like to be able to reveal this at the show.  If you are in the neighbourhood, do come by and see the show.  There are going to be over 100 quilts on display, a merchant's mall and tea room.  Come join us!

Thursday, October 11, 2012

Just some pictures for inspiration

A couple of weeks ago I went to a retreat and I posted about it here.  On our return home my friend and I decided to take a backroad so that we could take some photos that might act as inspiration for future quilts.  They might inspire colour combinations or perhaps techniques that we had not yet used.  The pictures were taken along the road through an area called Aspen Grove.  Enjoy them and perhaps they will inspire you to create some fibre art as well.
Along the road were tall stands of birch and aspen.  This is just one of those groupings.
Some groupings were so feathery and yellow that they almost looked unreal.


 There were flashes of colour all along the route. 
At one point though I took a look at my feet and this is what I saw.
These were no bigger than the finger nail on my baby finger. 
I would have overlooked these had I not looked down.
These looked like little puffs of dampened cotton, also overlooked had I not looked down.  There I was on my knees looking at all these little things.  As I looked up I couldn't resist taking the following picture.
Hope you enjoyed these.  That trip taught me to remember that there is inspiration everywhere, if you just take the time to take the road less travelled and enjoy the ride. 

Tuesday, October 9, 2012

TST #33 - Not Saturn's Rings

My Quiltsitters group is always coming up with unusual patterns that offer piecing challenges. One of those patterns called for piecing diamonds and nine patches together in such a way as to give the impression of forming a circle.

Here's the lap-sized quilt I created.

The diamonds were pieced of the dark purple and striped fabric.  Can you see the nine patches?  By placement of the light purple squares diagonally and then turning of them sufficiently you get the impression of circles.  Isn't that "cool"?

Saturday, October 6, 2012

When is a square not a square?

When it's a diamond.  I recently attended a retreat near Enderby, British Columbia.  At that retreat we were shown how to take a simple block, skew it and create some wonderful stars.  It was intrigung. 
It could have taken the entire weekend to create a design, but the hostess provided us with designs already created.  The designs were created from the blocks Maple Leaf and another that looked like this.


Once the blocks were skewed, they formed a diamond shape that was used to create six-pointed stars.  Once created, we coloured our pattern and then went to work cutting up our fabric.
This is what I coloured.
Because we had used tracing paper over our pattern, we could make several attempts at colour placement.  Here is another one of my attempts.
After several more colouring attempts, it was time to cut up our fabric. and create our pieces.  Would it be easier to understand if you saw it in fabric?  Here is my first piece.
If you flip this you should be able to see the skewed maple leaf block.  Well now it was time to make some more diamonds based on my chosen colour pattern.  This is what it was starting to look like.
How does a person hang this on the wall?  time to make more blocks to fill in the edges so that it becomes a hexagon.  It was really really bright.  I had to tone it down some and hopefully the background fabric that I purchased would do the trick.  Six more diamonds and I would have something that was easier to hang on the wall, or make an oh so pretty table topper.  What do you think?
 
Now I just have to sandwich it and quilt it.  But that is for another day.  I have to get a special quilt ready for our Guild's show coming up.  Till the next time....
 

Tuesday, October 2, 2012

TST #32 - My Guild's first Round Robin

I have always enjoyed sharing my enthusiasm for the craft of quilting with others.  So much so that I love to jump into a round robin of any sort as you saw in TST #11, #12 and #29.  A number of years ago as part of Show and Tell at our monthly Guild meeting, I showed the round robin quilts I had made. Guild members' interest was piqued enough that six of us decided to do a round robin.  I chose the following as my focus fabric.
I had to select a block to use for the initial round.  Hmmmm.  I had just purchased a copy of a magazine that had hundreds of blocks.  Perhaps I could find a block in there.  I can't remember right now what the name of the magazine was, but I think it was published by McCall's Quilting.  Here is the block.

Oh those points were something else to piece.  It truly tested my piecing ability, but I managed them and put the block into a box along with some additional fabric, some notes, a disposable camera and some chocolate (the sustenance required for quilting inspiration).  Here is what occurred over the several months that my little itty bitty block was passed from member to member.
 First round addition was triangles.  I know that it's hard to see them because of the poor photo, but they are there.
 Next the block was set on point and a log cabin variation was added to the corners.  Wendy, a mathemetician added this round and wrote in my journal "Long live Pythagorus."  Sorry if I spelled that wrong.  It has something to do with calculating the size of the triangles that she added.  I didn't undertand the formula, but I sure liked the end result.
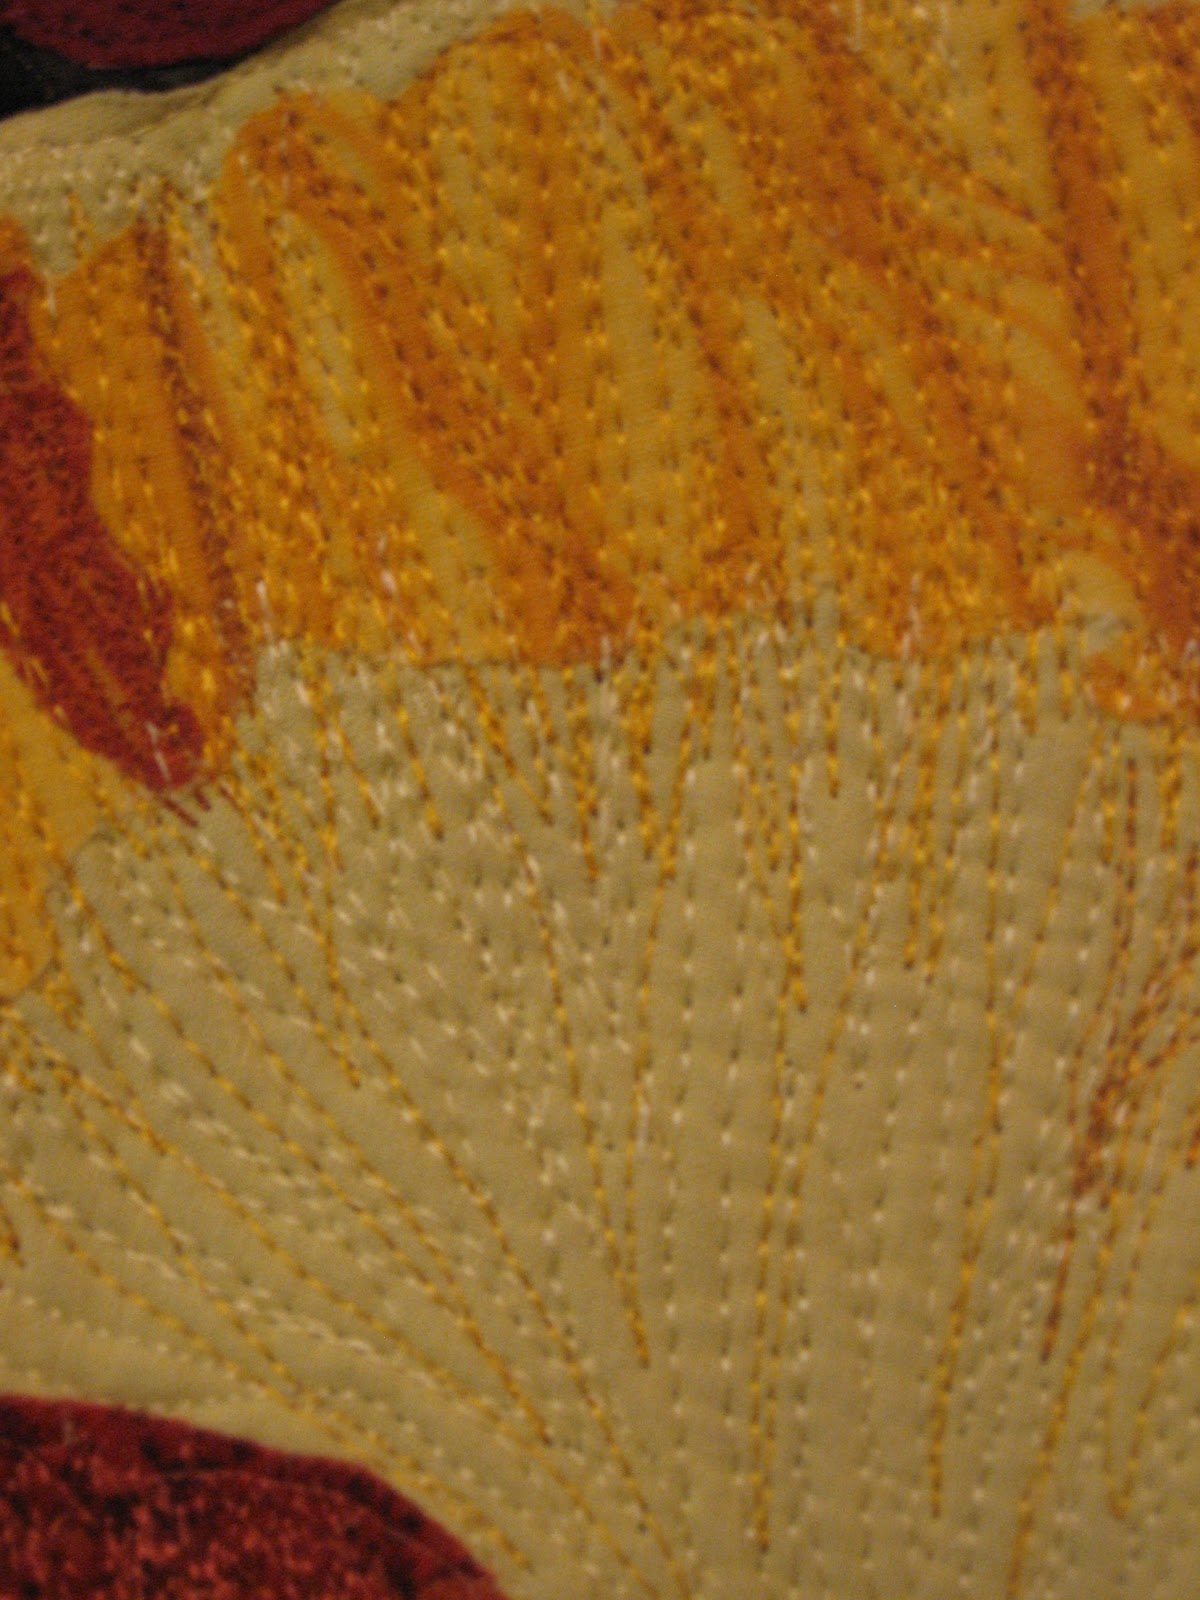
 Then the next round was the addition of applique.  Go back and look at the picture of the focus fabric.  Norma took the flower from the focus fabic, enlarged it, and created the applique.  The circular placement of the leaves enhanced the circular feel of the log cabin and created an autumnal theme to the piece.  I was going for a fall feel.  She did a wonderful job.
 Louise added the next round which consisted of squares.  She had written in my journal that she had completed the round with just the green and taupe couloured squres on the light background.  After looking at it on her design wall she decided it need something more and added the darker corner squares and rust coloured plain final border.
The final round, pieced by Lois had to include stars.  When I got this top back, I was pleased with the result.  It was now left to me to quilt it.  I hand quilted a cross hatch around the applique and Andrea completed machine quilting in the other rounds.  The piece now hangs on my dining room wall during harvest season.